Part 5 – Creating an application
In this part of this series, an OPML Editor Tool will be developed to interact with the Delicious social bookmarking service. You will need to have an active Delicious account with several entries to be able to use this application.
Delicious supports an Application Program Interface (API) which allows users of the service to get information on their bookmarks. Here are some requirements for a simple use of the recent bookmarks API.
Requirements
- Ability to enter username/password for Delicious account
- Ability to change default number of bookmarks to retrieve
- Ability to call Delicious API and retrieve bookmarks
- Ability to display retrieved bookmarks
From these requirements, a user interface, data design, and logic design for the application could be as follows:
User Interface Design
- Welcome page introducing the application and providing links to pages for viewing last x bookmarks, for updating username/password, and for updating default number of bookmarks to retrieve
- Page for updating username/password
- Page to confirm that username/password has been updated
- Page for updating default number of bookmarks to retrieve
- Page for confirming that default number of bookmarks has been updated
- Page for viewing last x bookmarks
Data Design
The application needs to save the following data:
- Delicious username
- Delicious password
- Number of bookmarks to retrieve
- Data received from call to Delicious API
Logic Design
The application should be able to call the Delicious API for recent bookmarks, get the bookmark data, save the data to the Tool database, and process the data to show the description for the bookmark and the URL. This logic should be activated by the web page that allows the user to view the number of recent bookmarks.
Creating the User Interface
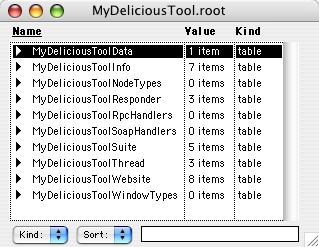
To begin, create a new Tool database for the application. As covered in part 1 of this series, to create a new Tool, click on the Tools menu in the OPML Editor application, then select “New Tool…”. A dialog box will appear asking you to name the tool, and suggesting the name “untitled.root”. Enter the name “MyDeliciousTool.root” in the dialog box and click the OK button. The OPML Editor will then create a new tool and store it in the Guest Databases/apps/Tools folder within the OPML folder. After several seconds, a new window will then open:
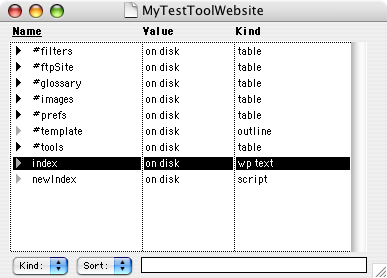
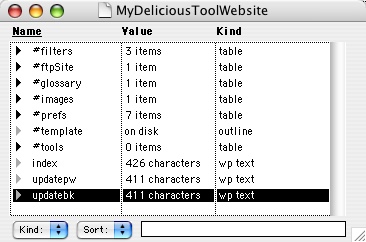
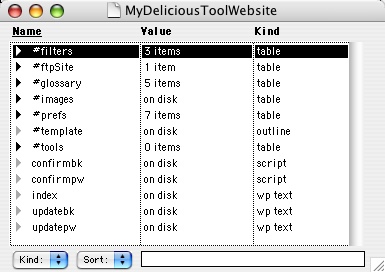
This example will start with the initial web pages for the user interface. As mentioned in part 1 of this series, the website table contains the web page data for the Tool. To view the website table for MyDeliciousTool, go to the Window menu and select the “MyDeliciousTool.root” menu option. After selecting the Tool, a window will open showing a list of tables making up the Tool. Hold down the Apple or Control key and double-click on the black triangle next to the text “MyDeliciousToolWebsite”. The following window will appear:
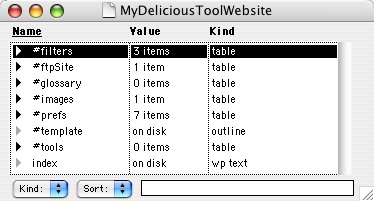
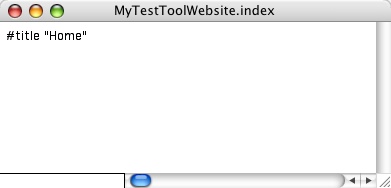
The table element “index” will be used to display the welcome page for our application. Double-click on the gray triangle to open the wp text object. The following window will appear:
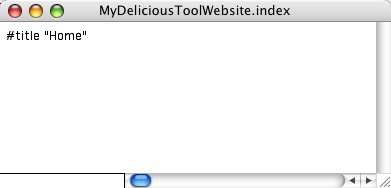
Replace the text in the window with the following text:
#title "MyDeliciousTool Home Page"
<center>My Delicious Tool Menu</center><br>
<br>

<ul>
<li><a href="updatepw.html">Update Passwords</a> - Enter your Delicious account username and password</li>
<li><a href="updatebk.html">Update Bookmarks</a> - Change the number of Delicious bookmarks to retrieve</li>
<li><a href="bookmarks.html">Get Bookmarks</a> - Get bookmarks from your Delicious account and display them.</li>
</ul>
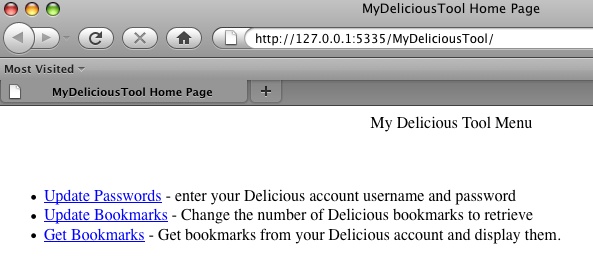
Close the window, then go to http://127.0.0.1:5335/MyDeliciousTool/ in a browser window. The home page should appear as follows:
The login page from part 4 of this series will be used as a starting point for the username/password and bookmark pages. Open the MyTestTool Tool database by going to the Window menu and select the “MyTestTool.root” menu option. A window will open showing the tables in the MyTestTool Tool database. Hold down the Apple or Control key and double-click on the black triangle next to the “MyTestToolWebsite” table entry. This will open the MyTestToolWebsite table in a new window. Next, click on the login entry in the table to select it (scroll down to find the entry if you need to), then go to the Edit menu and select Copy. Now, switch back to the MyDeliciousToolWebsite window. You can do this by clicking on the window if it is visible, or you can bring it to the front by going to the Window menu and selecting the “MyDeliciousToolWebsite” entry. When you have selected the window, click on the “index” item in the table, then go to the Edit menu and select Paste. You should see the “login” entry appear in the table. Go to the Edit menu and select Paste again to make another copy. A dialog box will appear saying “An item named login already exists in this location”. Click on the “Duplicate” button to create a copy of the login entry, which will be called “login #1”. To rename the entries, click on the name, which will highlight the name of the table entry, then type the new name. For our application, the names should be changed to “updatepw” and “updatebk” (without quotes) to match the links in the home page. The table should appear as follows:
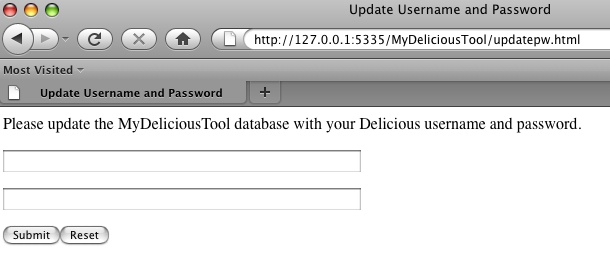
Open the “updatepw” wp text object in the MyDeliciousToolWebsite table to view the text. You can open the entry by double-clicking on the black triangle next to the entry name. Edit the text to match the following text:
#title "Update Username and Password"
<p>Please update the MyDeliciousTool database with your Delicious username and password.</p>
<form method="post" action="confirmpw">
<p>
<INPUT TYPE=text NAME="username" SIZE=50>
</p>
<p>
<INPUT TYPE=text NAME="password" SIZE=50>
</p>

<TABLE BORDER="0" CELLPADDING="0" CELLSPACING="0" WIDTH="100" cols=2>
<TR ALIGN="CENTER">
<TD><INPUT TYPE="submit" VALUE="Submit"></TD>
<TD><INPUT TYPE="reset" VALUE="Reset"></TD>
</TR>
</TABLE>
</form>
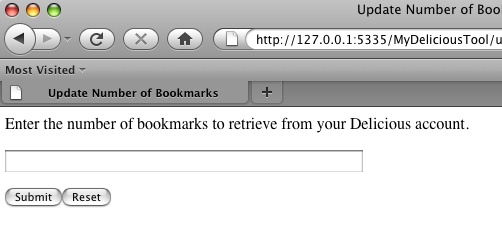
The main changes from the login entry are the title text, the first sentence of the page, and the action attribute in the form line (changing “confirm” to “confirmpw”). Next, open the “updatebk” entry and edit the text as follows:
#title "Update Number of Bookmarks"
<p>Enter the number of bookmarks to retrieve from your Delicious account.</p>
<form method="post" action="confirmbk">
<p>
<INPUT TYPE=text NAME="bookmarks" SIZE=50>
</p>

<TABLE BORDER="0" CELLPADDING="0" CELLSPACING="0" WIDTH="100" cols=2>
<TR ALIGN="CENTER">
<TD><INPUT TYPE="submit" VALUE="Submit"></TD>
<TD><INPUT TYPE="reset" VALUE="Reset"></TD>
</TR>
</TABLE>
</form>
The main changes from the login entry are the title text, the first sentence of the page, the action attribute in the form line (changing “confirm” to “confirmbk”), changing the first field from “username” to “bookmarks”, and deleting the field for “password”.
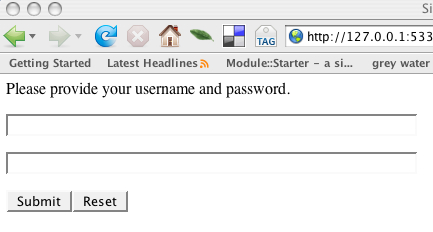
To test these entries, go to http://127.0.0.1:5335/MyDeliciousTool/ in a browser window, then click on the links for updating the username/password and updating the number of bookmarks. You should see the following web pages:
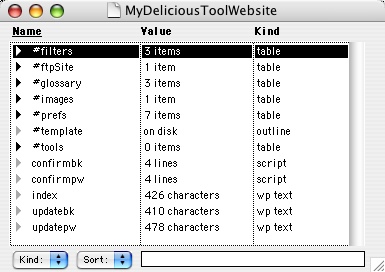
As in part 4 of this series, when the user enters the information in the text fields for these pages and clicks the “Submit” button, a confirmation page will appear to let the user know that the data has been updated. The confirmation page script from part 4 will be reused to create the confirmation pages for the MyDeliciousTool application. Bring the MyTestToolWebsite window to the front, select the “confirm” entry, then go to the Edit menu and select the Copy menu item. Bring the My DeliciousToolWebsite window to the front, then go to the Edit menu and select the Paste menu item. You should see the “confirm” entry appear in the table. Go to the Edit menu and select Paste again to make another copy. A dialog box will appear saying “An item named confirm already exists in this location”. Click on the “Duplicate” button to create a copy of the confirm entry, which will be called “confirm #1”. To rename the entries, click on the name, which will highlight the name of the table entry, then type the new name. The names should be changed to “confirmpw” and “confirmbk” (without quotes) to match the links in the web pages that were just created. The website table should appear as follows:
Open the “confirmpw” entry in the MyDeliciousToolWebsite table to view the script. You can open the entry by double-clicking on the black triangle next to the entry name. Edit the script to match the following text:
local (pta = html.getpagetableaddress ());
pta^.title = "Confirm Password Updates";
pta^.flShowTitle = true; //the page looks better with a title
return (MyDeliciousToolSuite.passwordConfirmation ())
The main change from the confirm entry is the name of the script being called. Next, open the “confirmbk” script and edit the text as follows:
local (pta = html.getpagetableaddress ());
pta^.title = "Confirm Bookmark Updates";
pta^.flShowTitle = true; //the page looks better with a title
return (MyDeliciousToolSuite.bookmarkConfirmation ())
The main changes from the confirm entry are the title text and the name of the script being called.
The confirmation script from part 4 of this series will be reused to complete the confirmation pages for the MyDeliciousTool application. Bring the MyTestTool window to the front, Hold down the Apple or Control key and double-click on the black triangle next to the text “MyTestToolSuite”. This will open the MyTestToolSuite table in a new window. Next, click on the ConfirmationScript entry in the table to select it (scroll down to find the entry if you need to), then go to the Edit menu and select Copy. Bring the MyDeliciousTool window to the front and double-click on the black triangle next to the “MyDeliciousToolSuite” entry. This will open the MyDeliciousToolSuite window. When you have selected the window, click on an item in the table, then go to the Edit menu and select Paste. You should see the “ConfirmationScript” entry appear in the table. Go to the Edit menu and select Paste again to make another copy. A dialog box will appear saying “An item named login already exists in this location”. Click on the “Duplicate” button to create a copy of the ConfirmationScript entry, which will be called “ConfirmationScript #1”. To rename the entries, click on the name, which will highlight the name of the table entry, then type the new name. For our application, the names should be changed to “passwordConfirmation” and “bookmarkConfirmation” (without quotes) to match the script names given above. The MyDeliciousSuite window should appear as follows:

Next, the scripts need to be updated to change the script names and to access data in the MyDeliciousTool data tables. Make the following updates to the passwordConfirmation and bookmarkConfirmation scripts:
on passwordConfirmation()
   local (pta = html.getpagetableaddress ())
   local (s1, s2, s3)
   new (tabletype, @pta^.searchArgTable)
   new (tableType, @MyDeliciousToolData.userdata)
   new (stringType, @MyDeliciousToolData.userdata.username)
   new (stringType, @MyDeliciousToolData.userdata.password)
   webserver.parseargs (pta^.searchargs, @pta^.searchArgTable)
   if pta^.method == "POST"
      new (tabletype, @pta^.postArgs)
      webserver.parseArgs (pta^.requestBody, @pta^.postArgs)
   s1 = pta^.postArgs.username
   s2 = pta^.postArgs.password
   MyDeliciousToolData.userdata.username = s1
   MyDeliciousToolData.userdata.password = s2
   s3 = "The username is " + MyDeliciousToolData.userdata.username + " and the password is " + MyDeliciousToolData.userdata.password
   s3 = s3 + "<br><br>Return to the <a href=" + "\"" + "http://127.0.0.1:5335/MyDeliciousTool/"+ "\""
   s3 = s3 + ">home page</a><br>"
   return (s3)
on bookmarkConfirmation()
   local (pta = html.getpagetableaddress ())
   local (s1, s2)
   new (tabletype, @pta^.searchArgTable)
   new (stringType, @MyDeliciousToolData.userdata.bookmarks)
   webserver.parseargs (pta^.searchargs, @pta^.searchArgTable)
   if pta^.method == "POST"
      new (tabletype, @pta^.postArgs)
      webserver.parseArgs (pta^.requestBody, @pta^.postArgs)
   s1 = pta^.postArgs.bookmarks
   MyDeliciousToolData.userdata.bookmarks = s1
   s2 = "The number of bookmarks is " + MyDeliciousToolData.userdata.bookmarks
   s2 = s2 + "<br><br>Return to the <a href=" + "\"" + "http://127.0.0.1:5335/MyDeliciousTool/"+ "\""
   s2 = s2 + ">home page</a><br>"
   return (s2)
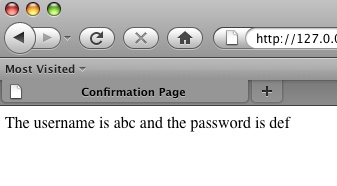
As in the MyTestTool tool, these scripts will parse data from the OPML Editor web server when the user clicks on the button to enter the username/password combination or the number of bookmarks to retrieve. The scripts will then clear the table entries in the database, store the new values, then echo those values to the web browser. To test these updates, go to http://127.0.0.1:5335/MyDeliciousTool/ in a browser window, then click on the “Update Passwords” link. You should see the following web page:
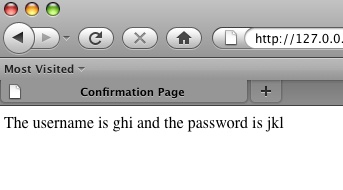
Enter a username and password, then click the Submit button. The web page will clear and display a text message echoing the username and password that you have entered. Click on the “Return to the home page” link to return to the tool home page. Next, click on the “Update Password” link. You should see the following web page:
Enter a value for the number of bookmarks to retrieve from your Delicious account, then click the Submit button. The web page will clear and display a text message echoing the number of bookmarks that you have entered. Click on the “Return to the home page” link to return to the tool home page.
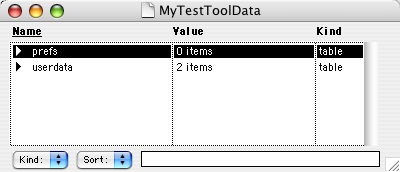
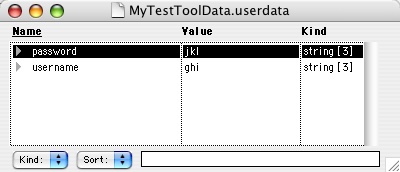
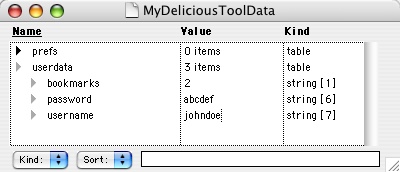
Now, check to see that the values entered on the web pages are in the tool data table. Bring the MyDeliciousToolData window to the front, then select the username entry in the table and double-click on the black triangle. You should see the new entries for your username, password, and number of bookmarks to be retrieved (the following picture is an example):
The final function to implement is to retrieve some bookmarks from your Delicious account. To do this, the OPML Editor will need to make a call to the Delicious API. This API requires a HTTPS call, which is not supported natively in the OPML Editor. However, the OPML Editor can call other programs or system functions to perform tasks. The cURL application will be used to perform the HTTPS call. The OPML Editor will parse the XML response from the API and display the bookmarks in the web browser. On the Macintosh, this can be accessed using a system command. On Windows, the cURL application will need to be installed if it is not present. Both Macintosh and Windows users should follow the rest of the instructions in this part of the series, but Windows users will need to wait to implement the changes in part 6 of this series before testing.
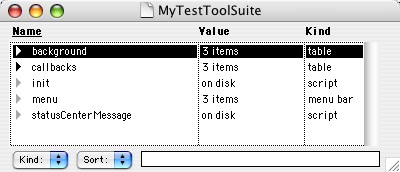
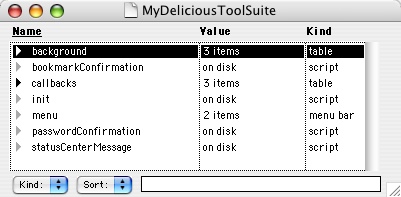
First, a script is needed to call the Delicious API and store the response. This script will be stored in the MyDeliciousTool Suite sub-table, and the response from the API will be stored in the MyDeliciousToolData sub table. To create the script, bring the MyDeliciousTool.root window to the front, then click on the triangle next to the MyDeliciousToolSuite entry in the tool table to select the sub-table. Next, hold down the Apple or Control key and double-click on the entry to open the MyDeliciousToolSuite table in another window. The following window should appear:
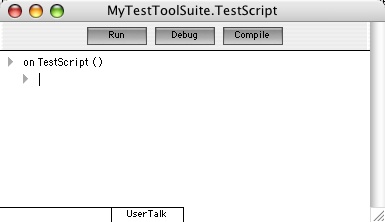
To add a script to the table, click in the table, then go to the Table menu and select the “New Script” entry. A dialog box will appear asking for the name of the script. Enter the text “curlDelicious” without quotes and click the OK button. A new script window will open as shown below:

Enter the following text into the script window:
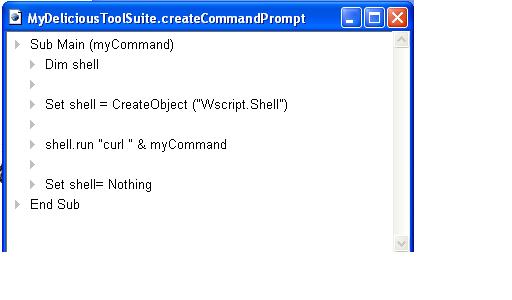
on curlDelicious ()
   local (s, curlCommand)
   s = "curl -u " + MyDeliciousToolData.userdata.username + ":"
   s = s + MyDeliciousToolData.userdata.password
   s = s + " https://api.del.icio.us/v1/posts/recent?count="
   s = s + MyDeliciousToolData.userdata.bookmarks
   curlCommand = s
   s = sys.unixShellCommand (curlCommand)
   wp.newTextObject (s, @MyDeliciousToolData.userdata.apiResponse)
   xml.compile (s, @MyDeliciousToolData.userdata.apiResponseCompile)
This script first creates a text string with the command for cURL. Notice how the data from the MyDeliciousToolData table can be retrieved by simply giving the name of the table path down to the cell containing the data. Next, the command string is passed to the cURL application using an OPML Editor command to tell the Macintosh to treat this as a command being entered at the command line. The response from cURL is stored as a string in the variable s. The response from the Delicious API is then stored in a new element in the MyDeliciousToolData table. Again, notice how the new element’s name is defined by a path in the table. Finally, an OPML Editor command is used to read the XML response from the Delicious API and store it in a table for further processing.
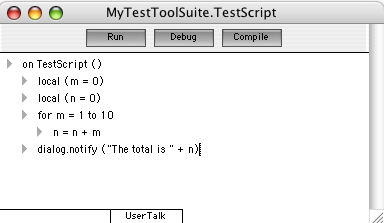
If you have completed entering the earlier scripts for adding your Delicious username and password, and have entered the username/password for your account, and have entered the number of bookmarks to retrieve, you can test this script in a standalone way. To do this test, double-click on the triangle next to the “on curlDelicious()” line to collapse the outline. Next, add another line with the text “curlDelicious()”. Click on the Compile button, then click on the Run button in the script window, then go to the userdata table and look at the apiResponse and apiResponseCompile entries. Make sure to remove the call to curlDelicious before moving on with this example.
Here is an example of the XML received from the Delicious API that was stored in the apiResponse entry in the table:
<?;xml version="1.0" encoding="UTF-8"?>
<posts user="andysylvester" tag="">
  <post href="http://www.frontierkernel.org/" hash="07aaaacf8d979a61f5d4cfecd4813f18" description="Frontier Kernel Project" tag="userland frontier" time="2007-11-28T07:14:39Z" extended="Home page for the open-source version of the Frontier scripting/development environment originally developed by UserLand Software."/>
  <post href="http://www.shinywhitebox.com/home/home.html" hash="5f8975874dfb433b4ee8cedbb0610fc7" description="iShowU Home Page" tag="mac software screencast screencasting" time="2007-11-28T07:12:33Z" extended="This is a new Mac OS X application for capturing on-screen video for screencasts and other applications."/>
</posts>
<!-- fe02.api.del.ac4.yahoo.net uncompressed/chunked Tue Jul 14 06:38:59 PDT 2009 -->
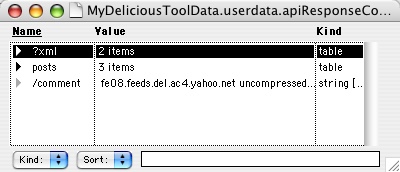
When the xml.compile command is executed by the OPML Editor, it structures the XML into a table as follows:
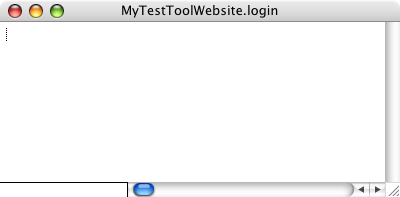
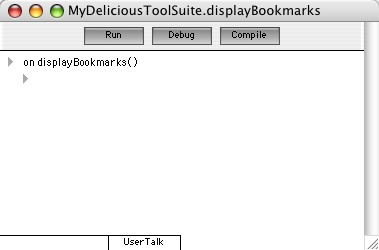
Next, the results from this script need to be displayed. To do this, another script will call the curlDelicious script and create a web page displaying the bookmarks within an HTML table. As before, this script will be in the MyDeliciousToolSuite table. Bring this table to the front, click within the table, then go to the Table menu and select the “New Script” item. At the dialog box prompt, enter “displayBookmarks” without quotes, then click the OK button. A new script window will appear as follows:
Enter the following text into the script window:
on displayBookmarks ()
   local (adr=html.table.new(border:3, cellspacing:6, cellpadding:8))
   html.table.addColumn(adr, "Description")
   html.table.addColumn(adr, "Link")
   MyDeliciousToolSuite.curlDelicious()
   myPosts = xml.getAddress(@MyDeliciousToolData.userdata.apiResponseCompile, "posts")
   myList = xml.getAddressList(myPosts, "post")
   for x = 1 to MyDeliciousToolData.userdata.bookmarks
      description = xml.getAttributeValue(myList[x], "description")
      link = xml.getAttributeValue(myList[x], "href")
      html.table.addRow(adr)^.cells={description, link}
   html.table.render (adr)
This script makes use of several OPML Editor commands to create an HTML table and display the results. The first three lines create an address to render the table and some attributes of the table. Next, the curlDelicious script is called to get the Delicious bookmark data. After that, an OPML Editor command is used to get the table address for the “posts” sub-table within the apiResponseCompile table. In the example XML response given earlier, the bookmark information is enclosed within a <posts> tag. The OPML Editor creates a table with the information enclosed within this tag. The xml.getAddress command retrieves the address of this table. Next, the address of the posts table is used to get a list of all of the entries within that table that have the value of “post”. In the Delicious XML data, each bookmark is separated by a <post> tag. When the XML is compiled into a table, a sub-table is created for each bookmark with its attributes stored in the subtable. The xml.getAddressList command creates a list of the table addresses for each of the bookmark entries. Finally, the script runs a loop in which the description and link for each bookmark entry is retrieved from the table and added to the rows in the table. The last step in the script is to render the table, which appears in the web browser.
The final step in adding this feature is to connect the web page link to these scripts. As was done for the username/password and bookmark functions, the web page will call a script to display the data from the Delicious API call. The confirmpw script willl be used as a starting point for this script. Bring the MyDeliciousTool.root window to the front, select the MyDeliciousToolWebsite entry, then hold the Apple or Control key down and double-click on the black triangle for the MyDeliciousToolWebsite entry. A window will open containing the MyDeliciousToolWebsite table as follows:
Select the confirmpw script entry, then go to the Edit menu and select Copy, then go to the Edit menu and select Paste. A dialog box will appear saying “An item named confirmpw already exists in this location”. Click on the “Duplicate” button to create a copy of the confirmpw script, which will be called “confirmpw #1”. To rename the entry, click on the name, which will highlight the name of the table entry, then type “bookmarks” without quotes. Double-click on the bookmarks item to open the script, then edit it to appear as follows:
local (pta = html.getpagetableaddress ())
pta^.title = "Display Delicious Bookmarks"
pta^.flShowTitle = true; //the page looks better with a title
return (MyDeliciousToolSuite.displayBookmarks ())
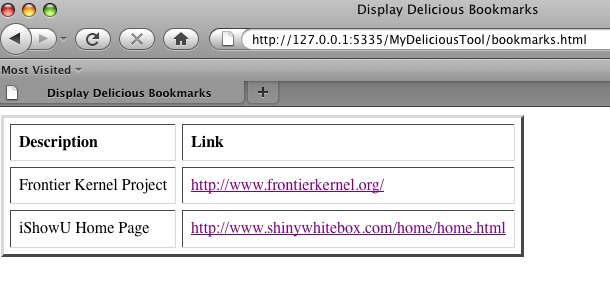
To view the bookmarks, make sure that you have entered the username and password for your Delicious account and that you have set the number of bookmarks to retrieve (it must be less than 100). Go to the main page of the application (http://127.0.0.1:5335/MyDeliciousTool/) and click on the Get Bookmarks link. Within a few seconds you should see a display of the bookmarks you have retrieved. Here is the bookmark display from the example XML shown earlier:
For Windows users of the OPML Editor, some additional steps are needed to be able to complete the MyDelicious Tool. First, cURL and several additional applications and files need to be installed on your computer. Next, some setup is required to support https transfers. Finally, some changes will be required for the scripts used in the Tool. These steps will be covered in the next part of this series.
Further Reading
The following links go into more detail on this part of this series.
- XML-Database – This page walks you thru techniques for managing XML-structured information in the OPML Editor object database.
Series Table of Contents:
- Part 1 – Installing the OPML Editor and creating a “Hello World” Tool
- Part 2 – Creating web pages and scripts
- Part 3 – Running a script from a web page
- Part 4 – Saving data in the tool database
- Part 5 – Creating an application
- Part 6 – Creating an application – Windows updates
- Part 7 – Conclusion