Part 2 – Creating web pages and scripts
Web pages
Another method that can be used to display a “Hello World” message is through the Tool website. Each Tool contains a table containing elements which the OPML Editor can render into a website. These elements can present information (like help pages for the Tool), but it can also be the user interface for a web application (as will be shown at the end of this series). In this example Tool, the table is called MyTestToolWebsite. To view this table, go to the Window menu and select the “MyTestTool.root” menu option. If you have not created this Tool, go back to part 1 of this series and create the MyTestTool Tool. After you select the Tool, a window will open showing a list of tables making up the Tool. Hold down the Apple or Control key and double-click on the black triangle next to the text “MyTestToolWebsite”. The following window will appear:
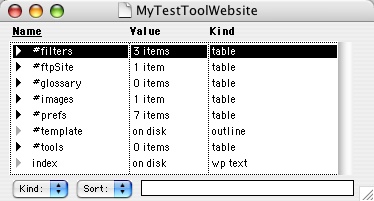
The table contains various tables, scripts and text objects that are used to create the Tool website. This example will work with the table element “index” to display a “Hello World” message.
The website for a Tool can be viewed while the OPML Editor is running. Use the base URL http://127.0.0.1:5335/, followed by the name of the Tool to view the web site. In our example, the tool name is MyTestTool, which makes the URL http://127.0.0.1:5335/MyTestTool/. Enter this URL in a browser window or click on the link in the previous sentence if the OPML Editor is running. A blank page with the title “Home” will appear in the browser window.
The OPML Editor uses the elements within the website table to create the website. Individual website pages can be created with simple wp text objects. In the default website table, there is a wp text object called “index”. To create a “Hello World” message on the Tool home page, add text to the index text object. Double-click on the gray triangle to open the text onject. You will see the following window:
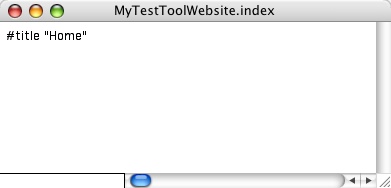
Click in the window at the end of the first line, then press Return and enter the text “Hello, world!” without the quotation marks. Close the window, then go to http://127.0.0.1:5335/MyTestTool/ in a browser window. The “Hello, world!” message will appear in the browser window.
Scripts
Part 1 of this series used a simple one line script used as part of an application menu. The next example will show how to create a script and display the results from running a script in a dialog box.
For this example, a script will be created in the MyTestToolSuite table. If you have not yet created the MyTestTool Tool, go back to part 1 of this series and create the Tool.
To open the MyTestToolSuite table, go to the Window menu and select the “MyTestTool.root” menu option. Press the Apple or Control key and double-click on the black triangle next to the text “MyTestToolSuite” entry in the MyTestTool.root window. A new window will open as follows:
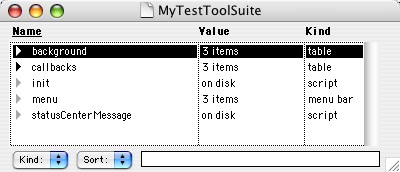
To create a new script object, click on the window shown above, then select the Table menu item, then select the New Script sub-menu item. A dialog box will appear, asking for the name of the script. For this example, enter “TestScript” and click the OK button. A new window will open as shown below:
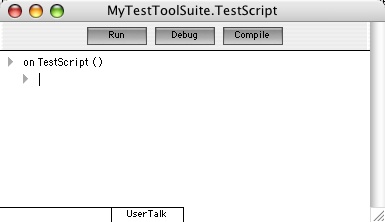
The OPML Editor creates a handler as the first line of the script. The handler includes the name that you entered when you created the script object. Below the handler is an indented triangle. This is the first line of the script, and it is blank. To begin writing the script, click next to the triangle and type the following lines, pressing the Return key at the end of each line:
local (m = 0)
local (n = 0)
for m = 1 to 10
   n = n + m
dialog.notify ("The total is " + n)
To indent the code to the right, press the Tab key. To indent the code back to the left, hold the Shift key down while pressing the Tab key. Your code should look like the following:
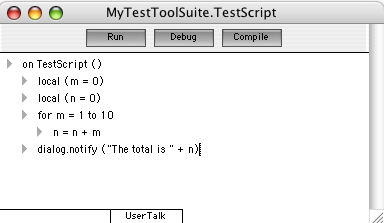
Finally, a call needs to be added outside the main script so that the script can be run. After the last line, press the Return key, then hold down the Shift key and press the Tab key. The gray triangle will move left to be at the same level as the handler. Type the name of the handler on the line as follows:
TestScript()
The final result should look like the following:

To run the script, click on the “Run” button at the top of the window. A dialog box should appear with the text “The total is 55”. Click on the OK button to close the dialog box.
The next part of this series will show how to take the script from this example and use it to display the results of the script in a web page.
Further reading
The following links goes into more detail on the concepts discussed in this part of the series.
- Keywords, Handlers, Verbs, and Calls – This section from Matt Neuberg’s tutorial “Serious First Steps in UserTalk Scripting” reviews more of the basics of scripting in the UserTalk language (see download link for full tutorial).
- Menus and Suites – Chapter 26 in “Frontier: The Definitive Guide” by Matt Neuberg discusses editing of menus in Frontier, much of which is applicable to editing menus in an OPML Editor Tool.
- Websites in Frontier – Matt Neuberg’s tutorial “Up and Running with Frontier Web Site Management” discusses a number of topics that apply to creating a website in an OPML Editor Tool, including creating a basic website and how Frontier uses directives to control the rendering of web pages (see download link for full tutorial).
Series Table of Contents:
Webmentions
[…] Developing OPML Editor Tools – Part 2 → […]