Part 1 – Installing the OPML Editor and creating a “Hello World” Tool
To get started, download the OPML Editor from the OPML Editor website and follow the instructions in the “Downloading a fresh install” section. After following the two install steps for your computer, the OPML Editor should be up and running.
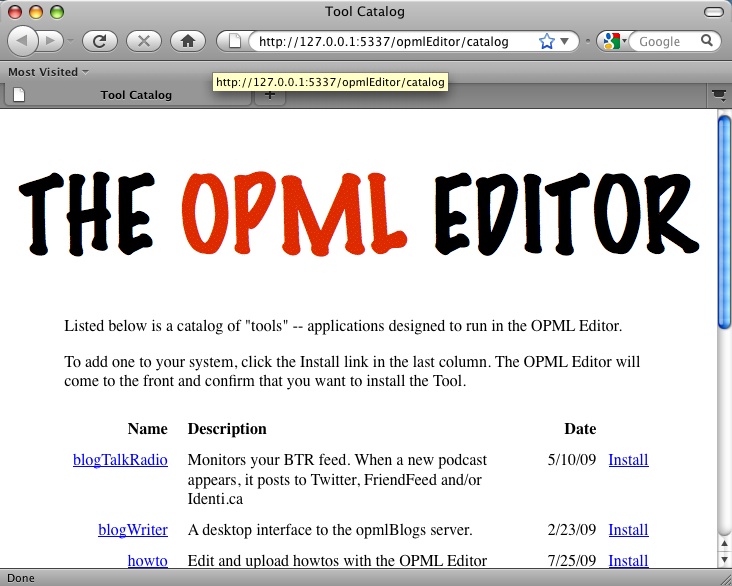
As the OPML Editor website states, the basic installation supports editing of OPML documents, but nothing else. Adding features to the OPML Editor involves installing or creating a Tool, which is an application that runs within the OPML Editor. To see a list of available Tools, make sure a web browser is running, then start the OPML Editor, go to the Misc menu, and select the Tool Catalog menu item. A window or tab will open in the web browser with a list of Tools available for download.
As an example to use in this series, click on the “Install” link for river2, a RSS newsreader set up in a River of News format. After a few seconds, the River2 home page should appear:
To use the River2 newsreader, follow the instructions in the “After installing” section of the home page.
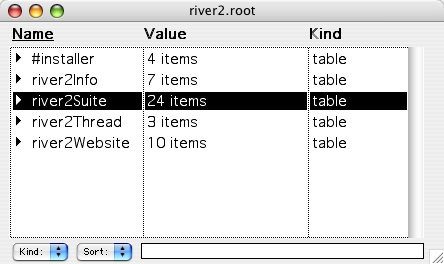
When you use River2, you only need to interact with the web browser. However, the OPML Editor is running in the background, running the actual application. To bring the OPML Editor to the foreground, click on the OPML icon in the Dock. To see the River2 application, click on the Window menu, then select river2.root. A new window will open as shown below:
All of the elements of the River2 Tool are shown at a high level. This file contains all of the data and scripts for the Tool. In the Frontier development environment (which is the basis of the OPML Editor), Tools are a type of guest database. In this series, we will focus on how to create a Tool within the OPML Editor development environment and how to create an application.
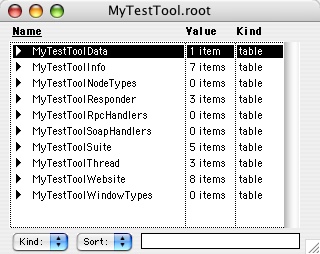
To create a new Tool, click on the Tools menu in the OPML Editor application, then select “New Tool…”. A dialog box will appear asking for a name for the Tool, and suggesting the name “untitled.root”. In choosing a name, keep the .root extension, as that tells the OPML Editor that this file is a Tool. Enter the name “MyTestTool.root” without quotes in the dialog box and click the OK button. The OPML Editor will then create a new tool and store it in the Guest Databases/apps/Tools folder within the OPML folder. After several seconds, a new window will then open:
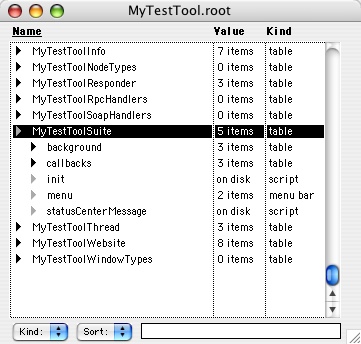
As shown in the screen shot, the MyTestTool Tool contains a number of elements called tables. These tables contain data and scripts for the tool functionality. You can create additional tables and elements within a tool, but this series will work with the default Tool setup. To look at the contents of a table within the Tool, you can double-click on the black arrow next to the name of a table. The contents of the table will then appear in the window below that item:
Another way to look at the contents of a table is to hold down the Apple key (for Macintosh) or Control key (for Windows) while double-clicking on the black triangle. This will open a new window with the contents of the table:
We will be working with the following tables in this series:
- MyTestToolData – Any data for the application will be stored here. There is a sub-table called “prefs” which can be used for preference data.
- MyTestToolSuite – This table contains scripts that perform the functions of the Tool.
- MyTestToolWebsite – This table contains the web pages that serve as the user interface of the Tool.
Application Menu
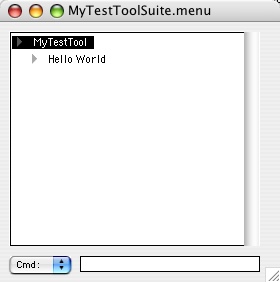
When the OPML Editor starts up, it scans the Tools folder and installs any Tools that are present. Each Tool has an application menu which is added to the Tools menu of the OPML Editor. To see an example of this, go to the Tools menu and select the MyTestTool item. You will see an arrow pointing to the right, indicating that there are additional menu selections available. If you follow the arrow to the right, you will find “Hello World” as a menu option. When you select this item, a dialog box will appear with the text “Hello, World.” Click on the OK button to close the dialog box.
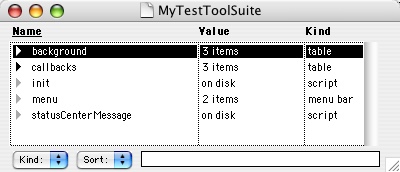
To see how this works, go to the Window menu and select the “MyTestTool.root” menu option. If you have not created this Tool, go back and create the MyTestTool Tool. After you select the Tool from the Window menu, a window will open showing a list of tables making up the Tool. Double-click on the black triangle next to the text “MyTestToolSuite”. This will display an element under that text titled “menu”. When you double-click on that text, another window will open, displaying an outline with the text “My Test Tool” and the text “Hello World”.
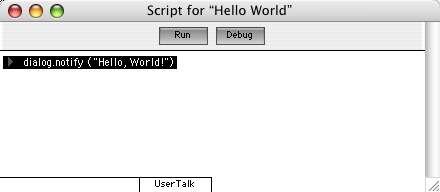
Double-click on the black triangle next to the “Hello World” text. Another window will open showing a script:
The script has one line: a command to display a text string within a dialog box. When the Tools | MyTestTool | Hello World menu item is selected in the OPML Editor application, this script is called.
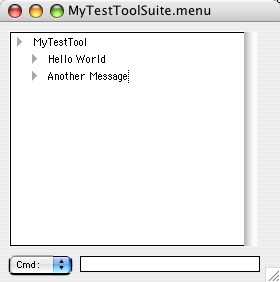
To create a new menu, click within the MyTestToolSuite.menu window at the end of the “Hello World” text, then press the Return key. A blank outline element will be created below the “Hello World” outline element. Enter the text “Another Message”. The window should now look like this:
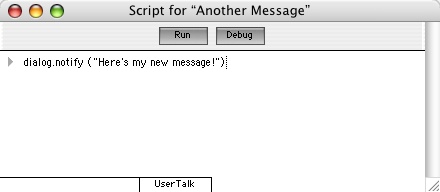
Double-click on the gray triangle next to the “Another Message” text. A script window will open with a blank script framework. To complete this example, click next to the gray triangle, then type the text “dialog.notify (“Here’s my new message!”)”. The window should appear as follows:
Click on the close button in the corner to close the window. The final step is to re-install the Tool, since a change was made to the Tool menu. Select the Tools | Re-install Front Tool… menu option. A dialog window will open asking if you want to re-install MyTestTool.root. Click the OK button and wait about 10 seconds. To test the new script, select the Tools | MyTestTool | Another Message menu item. A dialog box will appear displaying the message.
The next part of this series will show how to set up web pages and write scripts within a Tool.
Further reading
The following links go into more detail on the concepts discussed in this part of the tutorial.
- Tools – Gives an overview of the Tools framework in Frontier
- Getting Comfortable with Tables – From Matt Neuberg’s tutorial “Up and Running with Frontier Web Site Management”, this gives an overview of how tables are set up in Frontier, how to navigate tables, and how to edit elements in a table (see download link for full tutorial).
Series Table of Contents:

Webmentions
Notice: Trying to get property 'comment_date' of non-object in /home3/andysylv/public_html/wp-includes/comment-template.php on line 606
[…] Part 1 – Installing the OPML Editor and creating a “Hello World” Tool […]
Notice: Trying to get property 'comment_date' of non-object in /home3/andysylv/public_html/wp-includes/comment-template.php on line 606
[…] Part 1 – Installing the OPML Editor and creating a “Hello World” Tool […]
Notice: Trying to get property 'comment_date' of non-object in /home3/andysylv/public_html/wp-includes/comment-template.php on line 606
[…] Part 1 – Installing the OPML Editor and creating a “Hello World” Tool […]
Notice: Trying to get property 'comment_date' of non-object in /home3/andysylv/public_html/wp-includes/comment-template.php on line 606
[…] Part 1 – Installing the OPML Editor and creating a “Hello World” Tool […]
Notice: Trying to get property 'comment_date' of non-object in /home3/andysylv/public_html/wp-includes/comment-template.php on line 606
[…] Part 1 – Installing the OPML Editor and creating a “Hello World” Tool […]
Notice: Trying to get property 'comment_date' of non-object in /home3/andysylv/public_html/wp-includes/comment-template.php on line 606
[…] Developing OPML Editor Tools – Part 1 → […]