Part 3 – Running a script from a web page
Part 2 of this series showed how to write a short script and display the results in a dialog box. This part of the series will show how to display the results in a web page in two different ways The first is through the use of “macros”. Part 1 of this series looked at the website table within our test tool (MyTestToolWebsite) and at the index text object for the tool website. When the OPML Editor renders the content of any wp text objects, it can execute scripts whose names are included in the wp text object. This is done using open braces ({) and close braces (}) around the script name to indicate that the text is the name of a script. Here is an example of the technique.
To view the website table, go to the Window menu and select the “MyTestTool.root” menu option. If you have not created this Tool, go back to part 1 of this series and create the MyTestTool Tool. After you select the Tool, a window will open showing a list of tables making up the Tool. Hold down the Apple or Control key and double-click on the black triangle next to the text “MyTestToolWebsite”. The following window will appear:
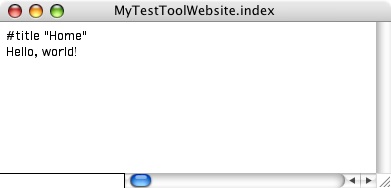
For this example, a macro reference in a script will be added to the table object “index”. The script from part 2 of this series will be used. To add a macro reference in the index wp object, click in the MyTestToolWebsite table, then double-click on the gray triangle next to the index wp text object in the table. The following window will open:
The “Hello World” text is still there from part 1 of this series.
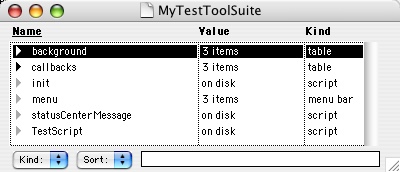
When the index page is rendered, the OPML Editor looks at the tables within the website table for macros or scripts that should be executed as part of the rendering process. The typical place for these scripts is in the #tools table within the website table. For this example, the test script from part 2 of this series will be copied and pasted it into the #tools table within the MyTestToolWebsite table. To do this, select the MyTestTool.root window, then hold the Apple or Control key down while double-clicking on the black triangle next to the MyTestToolSuite text entry in the table. A window will open showing the contents of the MyTestToolSuite table:
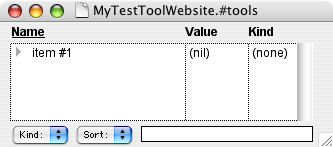
To copy the TestScript object, click on the gray triangle next to the TestScript text entry in the table. It should be highlighted as in the figure above. Next, go to the Edit menu and select the Copy menu item. To open the #tools table in the MyTestToolWebsite table, go to the Window menu, then select the MyTestToolWebsite entry to bring that window to the foreground. Hold the Apple or Control key down while double-clicking on the black triangle next to the #tools text entry in the table. This will open the #tools table as shown below:
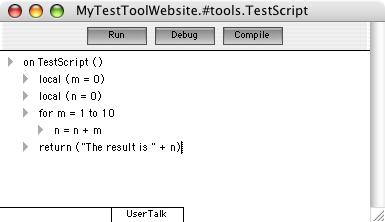
Click in the table, select the Edit menu, then select the Paste menu item. The TestScript object will appear in the table. To edit the script, double-click on the gray triangle next to the TestScript object. The script will open as shown below:
First, the call to the script handler at the end of the script needs to be deleted, as it will not be needed for executing the script from a web page. To delete the call, click on the gray triangle at the bottom of the script to select the line, then go to the File menu and select the Cut menu item. The line will be removed from the script. Next, the line with the dialog.notify command needs to be modified, since the results will be displayed in a web page instead of a dialog box. Change the text of the line from “dialog.notify (“The total is ” + n)” to “return (“The result is ” + n)”. The final result should look like this:
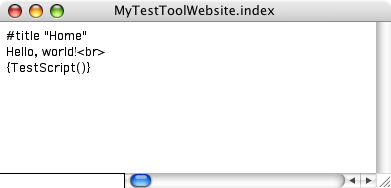
The script will now return the text in the parentheses, which will be included in the web page to be rendered. To set up a call to the script in a web page, the index wp text object in the website table needs to be edited. Since this object was opened earlier, go to the Window menu and select the “MyTestToolWebsite.index” menu item. Click in the window and type the text “{TestScript()}” without the quotes. The window should look like the following:
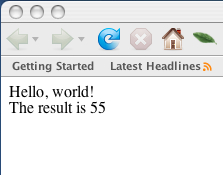
A script included in a web page through the use of the braces is called a “macro”. To view the results of your work, go to the home page for the MyTestTool website (http://127.0.0.1:5335/MyTestTool/). The following text should appear in the browser window:
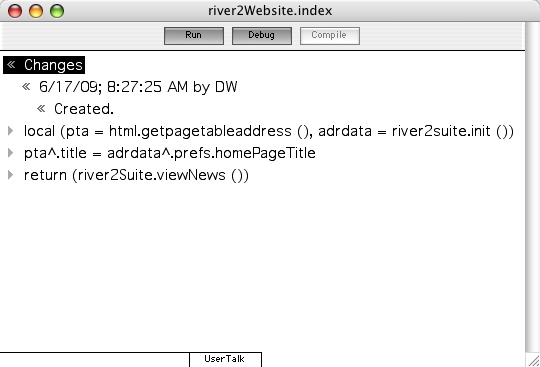
In addition to calling scripts using macros, an outline can be used to contain the content within a tool web page and have calls to scripts within the outline. The River2 Tool does this for its index page, shown below:
This technique can be used with the modified test script used for the macro example. First, the script in the MyTestToolSuite table needs the same changes as the macro example script. Go to the Window menu, then select the MyTestToolSuite menu item. The window will appear as follows:
Double-click on the TestScript entry and make the same changes as for the macro example. Next,
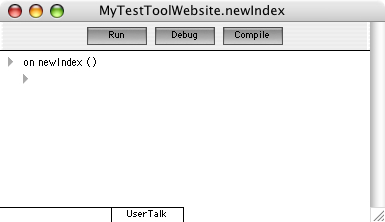
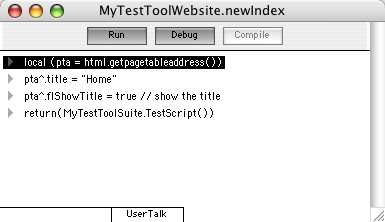
a script similar to the River2 index page script needs to be added to the MyTestTool website table. Go to the Window menu and select the MyTestToolWebsite menu item. Click in the window, select the Table menu, then select the New Script menu item. A dialog box will appear asking for a name for the new script. Enter the name “newIndex” and press the OK button. A new script window will open as follows:
Double-click on the triangle next to the newIndex text. This will collapse the outline elements. Next, enter the following text in the script:
local (pta = html.getpagetableaddress())
pta^.title = "Home"
pta^.flShowTitle = true // show the title
return(MyTestToolSuite.TestScript())
Click on the black triangle next to the newIndex handler to select the line, then go to the Edit menu and select the Cut menu item. The top item will be deleted from the outline. Your window should appear as follows:
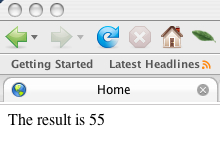
Close the window, then go to http://127.0.0.1:5335/MyTestTool/newIndex. You should see the following web page in your browser.
The next part of this series will build on the previous examples, showing how to call scripts and save data in the Tool database.
Further Reading
The following links go into more detail on parts of this tutorial.
- Includes and Macros – This page from Matt Neuberg’s Frontier Web Tutorial talks about how to add calls to Frontier scripts (macros) within web pages (see download link for full tutorial).
Series Table of Contents:

