in Web Audio API

TSW Web Audio Primer – Part 2

In part 1 of this series, we played a pitch using the Web Audio API. Let us set up a way to change the pitch of the note. Add this logic to index.html from Part 1 to add a slider element:

FROM:

[ccie_html]

<div class=”starter-template”>
<p>Press Play to hear how the pitch sounds. <button onclick=”turn_on();”>Play</button></p>
<p>Press Stop to turn it off. <button onclick=”turn_off();”>Stop</button></p>
<center><p><input id=”slider” type=”range” min=”0″ max=”1000″ value=”600″ onchange=”changePitch(this.value)”></p></center>
</div>

[/ccie_html]

TO:

[ccie_html]

<div class=”starter-template”>
<p>Press Play to hear how the pitch sounds. <button onclick=”turn_on();”>Play</button></p>
<p>Press Stop to turn it off. <button onclick=”turn_off();”>Stop</button></p>
<center><p><input id=”slider” type=”range” min=”0″ max=”1000″ value=”600″ onchange=”changePitch(this.value)”></p></center>
</div>

[/ccie_html]

Next, create a file (slider.css) and add the following CSS logic to adjust the size of the slider:

[cc lang=”javascript”]

.slider-width200

{

width: 200px !important;

}

[/cc]

The “!important” text is needed to override some default Bootstrap CSS logic.

Finally, in pitch.js, add the following function to be called when the position of the slider changes:

[cc lang=”javascript”]

function changePitch(newValue)

{

osc.frequency(newValue);

};

[/cc]

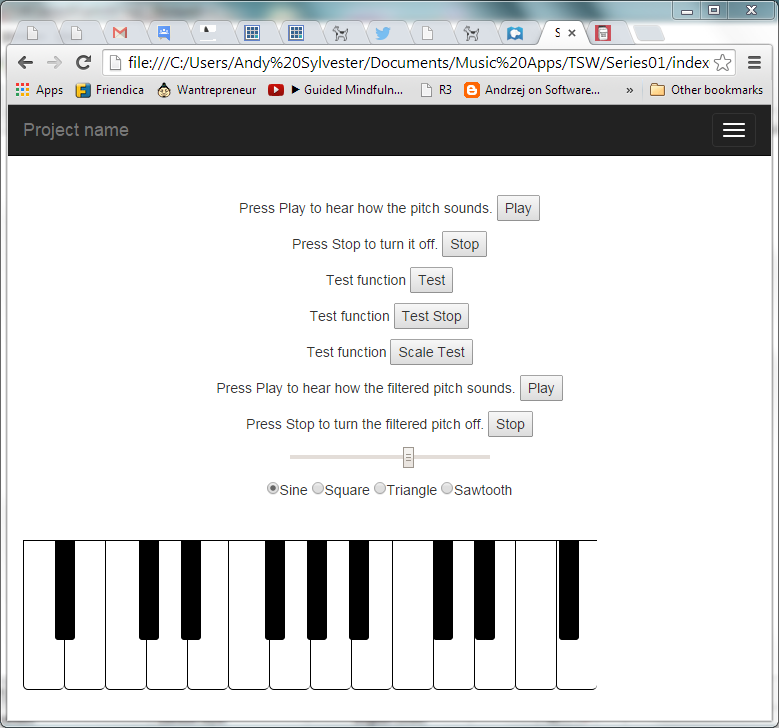
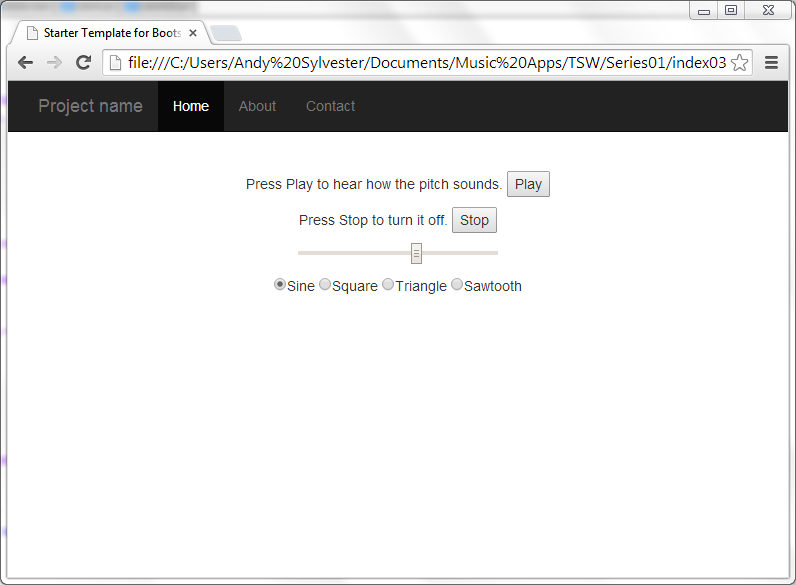
When you have completed those changes, load index.html to see the following:

ex02_01

Click on the Play button, and you should hear the original pitch. Now move the slider to the right. When you release the slider, you should hear the pitch go up. If you move the slider to the left, the pitch will go down.

You can also go to the demo of this application and see if you can change the pitch.

Download the source code for all of the examples in this series from Github.

References:

WebTUTSDepot: Tutorial for HTML5 sliders

StackOverflow: How to Overwrite Styling In Twitter Bootstrap


    Mentions

  • 💬 TSW Web Audio Primer – Part 7 – Andy Sylvester's Web
  • 💬 TSW Web Audio Primer – Part 3 – Andy Sylvester's Web
  • 💬 Stuart Memo

Write a Comment

Comment

Webmentions

  • You have seen examples of how to play notes, chords, and scales using TSW. Now, let’s swing back to how you can modify the sounds that you can create with TSW. We will start with a single pitch sine wave and see how different filters sound.
    TSW contains a function that creates a filter node, which removes certain frequencies from any audio passed through it. Here is the sample code from the TSW website:
    var filter = tsw.filter({
    type: ‘lowpass’,
    frequency: 200,
    Q: 1});
    There are three inputs: the filter type, the cutoff frequency, and a quality factor (Q).
    The Biquad Filter Node page on the Mozilla Developer Network site gives an excellent description of the filter types that are supported in TSW. Let’s explore the first one in the list (lowpass filter). From the lowpass filter description, input frequencies that are lower than the cutoff frequency pass through. When the input frequency is larger than the cutoff frequency, the input is attentuated (gets softer). Let’s explore how this works. Our oscillator frequency is set to 600 Hz. Let us start with the filter cutoff frequency set to 800. This should result in no change to the sound.
    Add the following functions to pitch.js:
    function turn_on_filter() {var filter = tsw.filter({
    type: ‘lowpass’,
    frequency: 800,
    Q: 1});
    osc = tsw.oscillator (frequency, oscType);
    tsw.connect(osc, filter, volume, tsw.speakers);
    osc.start();};function turn_off_filter() {
    osc.stop();};
    Next, we will add two new buttons to turn the filtered sound on and off.
    FROM:
    <p>Test function <button onclick="playScale();">Scale Test</button></p>
    TO:
    <p>Test function <button onclick="playScale();">Scale Test</button></p><p>Press Play to hear how the filtered pitch sounds. <button onclick="turn_on_filter();">Play</button></p><p>Press Stop to turn the filtered pitch off. <button onclick="turn_off_filter();">Stop</button></p>
    Load index.html in your browser and you should see the following:

    Click the Play and Stop button for the filtered pitch, then click the Play and Stop buttons at the top of the page. The volume of the pitches should sound the same.
    Next, change the cutoff frequency for the filter to 500, then 200. You should hear a slight decrease in volume at 500, and a noticeable decrease at 200. The other parameter of the filter that can be varied is the Q factor. The greater the value of Q, the greater the peak around the cutoff frequency. To see this effect, set the cutoff frequency to 590, then start increasing the value of Q. At values of 50 and above, you should hear some interesting distortion of the pitch.
    The second type of filter (highpass) works in the opposite manner as the lowpass filter. Frequencies above the cutoff frequency are not affected, but frequencies below the cutoff frequency are attenuated (gets softer). To demonstrate this effect, you can change the type definition in the filter to ‘highpass’. Next, you can start increasing the cutoff frequency above the oscillator frequency (600) to hear the effects of the filter. You will have to increase the cutoff frequency above 1500 to start hearing some decrease in volume.
    The third type of filter (bandpass) works over a range of frequencies from the cutoff frequency. Inputs within the range pass through unchanged, but inputs with frequencies outside of the range are attenuated (play softer). The size of the range of frequencies is controlled by the value of Q (large Q = large range around the cutoff frequency). To demonstrate, set the filter type to ‘bandpass’ and the value of Q to 100. Next, click the Play button, then change the pitch using the slider control. Moving the control to the left or right will result in a decrease in volume along with the change in pitch.
    The next three filters (lowshelf, highshelf, and peaking) are similar to the lowpass, highpass, and bandpass filters in that inputs below the cutoff frequency, above the cutoff, or within a range are affected. The effect can be either an increase or a decrease in volume, depending on the gain setting of the filter. The tsw.filter function does not have a way to set this gain directly, so to be able to manipulate the filter gain, we will have to use the tsw.context function in TSW. This allows the user to be able to create nodes using native Web Audio API functions. Here is a modified example of the turn_on function using this feature:
    function turn_on() {
    biquadFilter = tsw.context().createBiquadFilter();// Manipulate the Biquad filter
    biquadFilter.type = “peaking”;
    biquadFilter.frequency.value = 435;
    biquadFilter.gain.value = 25;
    biquadFilter.Q.value = 100;
    osc = tsw.oscillator (440, ‘sine’);
    tsw.connect(osc, biquadFilter, volume, tsw.speakers);
    osc.start();};
    One note on this example code: I was not able to get an attenuation (decrease in volume) when the filter gain value was negative.
    The final two filter options are the notch and allpass filters. For the notch filter, if the filter frequency and Q value is such so that the input frequency is outside the range of the filter, there is no effect on the output of the filter. As the filter frequency approaches the frequency of the input, the sound is attenuated (gets softer), with the initial sound of the attack followed by a softer tone. When the frequencies are the same, the only sound is the initial attack (sounds like a beep!).
    For the allpass filter, as the filter frequency approaches the frequency of the input, the sound begins to change (phase change). When the two frequencies are the same, there is a slight delay in the start of the sound for Q = 1. As the value of Q increases, interesting things start to happen with the sound. At 100, the sound attack is normal volume, then decreases, then increases (like a “wow-wow” effect).
    To make it easier to experiment with filters, I have created a new user interface just focusing on filter experiments:

    You can go to the demo of this application and try it for yourself. The example source code is also available on Github.
    Resources:
    Mozilla Developer Network: Page on biquad filters
    O’Reilly.com: Boris Smus book on Web Audio API, link to chapter on filters
     

  • In part 2 of this series, you learned how to change the pitch of a note. In this part, you will learn how to change the oscillator type. Add the following HTML logic after the slider logic from Part 2 to set up a form with radio buttons:
    FROM:
    <center><p><input class="slider-width200" id="slider" type="range" min="0" max="1000" value="600" onchange="changePitch(this.value)"></p></center>
    TO:
    <center><p><input class="slider-width200" id="slider" type="range" min="0" max="1000" value="600" onchange="changePitch(this.value)"></p></center><form><input type="radio" name="oscType" value="sine" onclick="getOscType(this.value);" checked>Sine<input type="radio" name="oscType" value="square" onclick="getOscType(this.value);">Square<input type="radio" name="oscType" value="triangle" onclick="getOscType(this.value);">Triangle<input type="radio" name="oscType" value="sawtooth" onclick="getOscType(this.value);">Sawtooth</form>
    Next, we will make several changes to pitch.js. First, add a variable for the type of oscillator:
    FROM:
    var osc;var volume;
    TO:
    var osc;var oscType = ‘sine’;var volume;
    Next, we will change the turn_on function to use the new oscType variable.
    FROM:
    function turn_on() {
    osc = tsw.oscillator (600, ‘sawtooth’);
    tsw.connect(osc, volume, tsw.speakers);
    osc.start();};
    TO:
    function turn_on() {
    osc = tsw.oscillator (600, oscType);
    tsw.connect(osc, volume, tsw.speakers);
    osc.start();};
    Finally, we will add a new function as follows:
    function getOscType(value){
    oscType = value;
    osc.type(oscType)}
    This function will be called whenever a new radio button is selected, and will change the oscillator type for the current note being played.
    Load index.html in your browser and you should see the following:

    As before, click the Play button to start playing. You can change the pitch using the slider, and when you select a different radio button, the oscillator type will change for the pitch being played.
    You can also go to the demo of this application and see if you can change the oscillator type.
    Download the source code for all of the examples in this series from Github.
     

  • retweeted this.